Nov 25th - Roll Cage is In

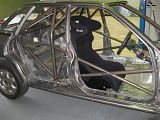
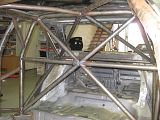
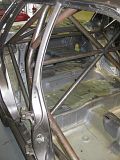
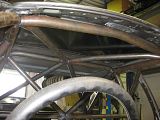
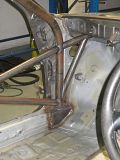
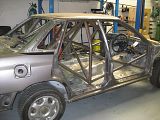
The roll cage is in, and it looks great..

PhotobucketPhotobucketPhotobucket

PhotobucketPhotobucketPhotobucket

Nick and the guys at NA Autosport & Engineering have done a great roll cage, next week they will be putting in the seat mounts, spare wheel support, jack support, putting in supports for jacking points and strenghting up the strut towers. Once this is done the car will be heading back home so I can start the rebuild and get the engine in.

I'm getting the guys at NA Autosport & Engineering to do a few more mechanical upgrades including the rear diff (platted), front diff in the 6 speed (LSD) and new bushes for all suspension items, all to group N specs.

I'm looking forward to gettng the car back, as I've run out of things to do without the car being here...

Photobucket

Nov 23rd - Quick update

Just a quick update, I've been cleaning and painting more bits to go onto the car, not much left to clean actually, I'm down to the nuts and bolts...
The car is almost done at the shop, I hope to have it back in the next week or two, and get stuck into the assembly over the xmass break, I'll try my had at videoing the build, less words...

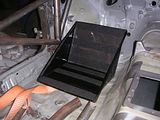
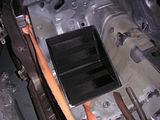
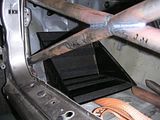
A few pitures to keep things going, here are some pick of a new carbon fiber footrest, and you can see part of the cage, which is being built to 2012 CAMS rules.

PhotobucketPhotobucketPhotobucket

I will get more picture of the cage on Friday...

Day 50 - 30th October 2011, Time for a bit of painting

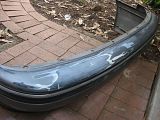
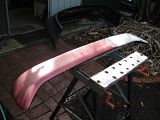
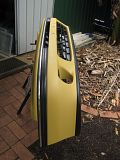
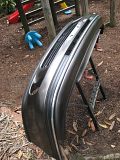
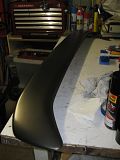
The past few weeks I've been making sure everything is cleaned and ready to go back on the car.  The front bumper was always an issue, scratched, paint missing and it had a few dints in it.  The rear bumper was in good condition as is the rest of the cars body.  One thing that was missing was the rear wing, when I got the car it was missing, just a few holes in the boot where it used to be.  Well last week one came up on the RSLC forums and I got it, red in colour and the paint flaking off, but it was in one piece and the bonus was it came with the boot, so a spare boot.


PhotobucketPhotobucket
The first job was to sand down both part, as well as get ride of the dints in the bumper.  After watching a few video's online (might car mods being one), I got out the heat gun I used to remove the tar and slowly heated up the bumper.  A few pushes with the blunt end of the hammer and massaging the plastic and it actually looked good, and after a bit of sanding you would never know there were any dints.  Tapped up the  bumper and a coat of primer, followed by more sanding and more tapping then a top coat the bummer looks great, as does the now silver rear wing.

PhotobucketPhotobucketPhotobucket

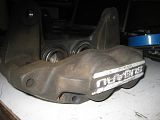
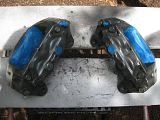
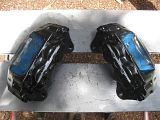
Next item was the front brakes, these where 4 pot 99 STI brakes, bigger brakes then the RS original 2 pot but not as large as Brembo's or big WRX brakes as the rims are still only 15".  Still the callipers needed a bit of modification to make them fit, the rims I've got have a 35mm off set, where the RS rims are 45mm.  All that means the callipers foul the rim, the fix is to grind a bit of the calliper body away until they are clear.  The other option was to fit spacers on the rim, well at the moment I have about 2mm clearance, so I might still go 5-10mm spacers for the extra clearance, will see how things go.  Now the callipers fit a quick clean with the grinding wire wheel, tape it up and paint them black ready to be installed.

PhotobucketPhotobucketPhotobucket

Other things that are in progress as part of the build, new Jim Berry racing clutch, flywheel has been machined, rear diff is being rebuilt with new plates so it will be a locked diff, wheel hubs are being pulled down to have new wheel bearings and seal along with new wheel studs 1" longer, new rear trailing link, new bushes to replace all suspension bushes, new STI top strut mounts and new DMS 50mm coil overs.

So is the build out of control yet??

First Taste of the Rally Adventure

At the start of September I applied and got my CAMS Clubman Rally License, isn't that hard to get really, 25 question online test, have held a license for 5 years and your older than 25. A week later I had my license, this will allow me to enter any state based rally event.

So on the 24th September BSCC was holding a Khanacross and Come and Try Event at Bli Bli in a sugar cane field. This was for first timers to get use to how a rally was run as well as drive on a track at speed, and you can use your road car, perfect.

Monday 19th
Downloaded the forms and read the Sup regs a few times, as I was going to use the road going RS Liberty so I had to install a fire extinguisher into the car to meet the regs.

Wednesday 21st
Paperwork night at the BSCC club rooms, the main item checked where, extended CPI for a day ($10), rego, licenses, entry form and $60 fee. We also got a set of pace notes for each of the 3 tracks, this was so we could get use to tulip directions.

Thursday 22nd
Spent a few days chasing up a set of used rally tires for the rims I got a month back for the rally car, Ross dropped them off today for two bottles of Bundy. Worked out a list of tools and part to take, just in case.

Friday 23rd
Half day at work today so the afternoon was spent getting ready for tomorrow. Drove down to Revolution Race gear to pick up a balaclava and a fire extinguisher for the car. Also got the tires fitted to the rims, $60 for 4 tires, not cheap. Then packed the car, with the tools and fluids I might need, just fitted with 4 tires also in the back. About 7am I realised I had forgotten to install the fire extinguisher, so ripped out and drilled holes in the floor and installed it.

Saturday 24th (Bli Bli is about 130km away and the event started at 7.30am)
Kevin arrived at about 5am, he was the co-driver for the day, and we headed off for Bli Bli. On arriving at the location we were the first to arrive apart from the coffee van which was setting up, we picked a spot and got setup. Tires went on as more competitors arrived; by 7am 25 odd cars had turned up, most of the cars where rally cars with a few road cars and the odd off road rally 4x4.
At 7am we signed in, got a number for the car, No.9 in our case and the car was looked over by the scrutineers. We then had a driver’s briefing, then a slow drive around the track following each other around to get an idea what the track looked like and to have a read over the pace notes.

Then it was time to go.

We were the 5th car ready to start, track 1 was 1.45km long, rectangular course with a few chicanes every now and then to slow you down as well as a muddy patch and a few dips.

Countdown 30sec to go, then 10sec, at this point the Xbox gamer clicked in 5,4,3, cars revving to about 5000/6000 rmp at this point ,2,1 drop the clutch and were gone, I was going to take it easy the first time around, but it’s hard to take it easy I found out. The first track was great, Kevin was yelling out instructions, but a little late, crest, oopps too late, dip, corners mud, dip, finish. Our first run was a 1.48 great fun, and the car was i one piece.
Track 2 was a little longer, and a lot rougher, but once I heard 5,4,3, it was on.. I'm not sure what we got for that track, but it was two laps, the second lap was lots faster.
Then it was back to Track 1, track 3 was going to be in the afternoon.
Did track 1 again, this time I got a better start, and finished with a 1.42. After going to the pits and looking the car over for damage, we decided that we would just do track 1 as track 2 was way too rough for a road car.
So back to the start of Track 1, this time a little more aggressive in the corners and braking, a 1.40 followed by a 1.42. Our 4th time around would be our last, we started well, but the smell of the clutch was a sign that we were pushing way to hard, and the brakes where getting a little soft as well, but we did do a 1.38 and hit 100km/hr on the back straight.
We stopped for the BBQ lunch, all part of the entry fee, free burger and drink.
Then after lunch we both agreed that we should call it a day, we still had 130km to drive home, so we watch some of the others, packed up and headed home.

This was a great day, had loads of fun and meet lots of new people. Next time I will have the rally car for the event and should be able to push a little more with worrying too much.


Photos of the day
Look for the white RS Liberty Wagon
Day 48 - 22nd August 2011, Build slows

It has been a few months, and being winter, it's been slow progress on the build.  I've also a little distracted building a larger carport and converting it into a garage so I can work on the car a night.
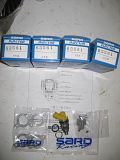
I have got a few things done since the last post, new Sard 650 injectors have been installed, the exhaust cleaned up, painted and wrapped, and the dash covered with suede.
The Injectors where an easy install, the hardest part was getting the right O-rings, but it’s been well covered on the RS Liberty Site, and they installed without issue.

PhotobucketPhotobucket


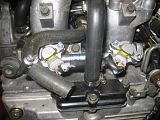
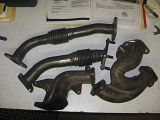
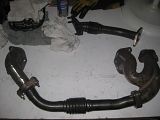
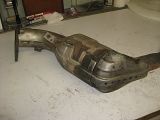
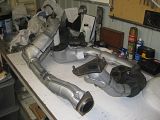
Next was the exhaust, this was a little more work, some of the heat shield was bolted together, but most of it has been welded together, a bit of careful grinding was needed to get it apart. The manifold was in good shape, after removing the heat shields and giving it a clean with a wire wheel, it looked like new. The tabs and excess casting steel where also ground off, this was to make wrapping the exhaust a little easier.

PhotobucketPhotobucketPhotobucket

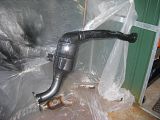
The dump pipe also looked a little old, it required more grinding to get it apart, but once it was the wire wheel made it too look like new.
PhotobucketPhotobucketPhotobucket

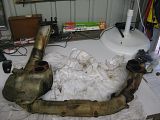
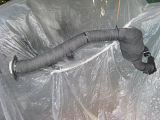
Each part of the exhaust was painted with heat pain, then wrapped, painted again with heat pain then the heat shield placed over the top. The idea is to keep as much of the heat in the exhaust and out of the engine bay and under the car.
Photobucket
In the end, 30m of 50mm Cool-It heat proof tape and 3 cans of Hi-Heat coating paint was used, the manifold was wrapped in Generation II Copper Header wrap and the up and dump pipe in Exhaust Insulating Header Wrap (Graphite black), so it will be interesting to see the difference between the two point in temperature with the copper tape being 30% better according to the literature.

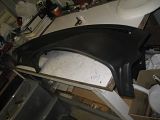
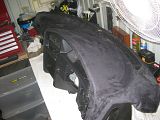
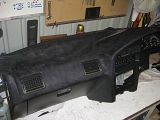
The dash was also covered with suede to reduce the reflection of the dash on the windscreen. $25 of suede from Spotlight, a can of adhesive and 1 hour later the job was complete.
PhotobucketPhotobucketPhotobucket

I also picked up some more parts for the car from a 1999 STI, quick rack, 4 pot front brakes, hubs, disc’s, control arms (alloy) and CV’s as well as new STI 6Speed gearbox mount, clutch slave cylinder and new safari engine mounts.
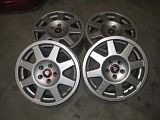
A few weeks back I also picked up some SpeedLine Racing Rims, these fit over the older 4 pot brakes I've picked up, just.

Photobucket

Day 43 - 8th May 2011, Engine rebuild almost done

The past month has been all about getting the right bits to get the engine back together, for most of the parts it’s been 19 years without replacement. Some of the hoses have gone hard and brittle, while bolts have been over torqued to a point of breaking. But a few trips to the local Subaru dealer and parting with some money fixed that problem. Again I’ve gone a little over board, the intention was to just clean the engine and replace the timing belt, but then I started reading the manual, and the manual is a very good manual. So I removed the inlet manifold, followed by the cam covers, timing belt, pulleys, idlers, cams and head, and I was left with a block. The good thing is I know how to pull it all apart.


Since it was all apart, I had the heads machined cleaned and the valves done, the block ground and measured to see what gasket to fit. After 19 years, the heads have been done a few times, and so looks like it will be new heads if it need to be done again.


Putting the engine back together was all about reading the manual and looking over picture that I’ve taken before. Following bolt torquing instructions, especially on the heads. The head gaskets I’ve used Copper Gasket Spray, and the gasket was the thickest metal gasket Subaru sell.


As the engine was undercover but still in the open, each day I would wrap the engine in cling wrap, seems to be a good way to keep the dust and bugs away.


As you pull bits apart you bag and tag everything making sure you know where things are and where they go.  But you still end up looking at photos of bolt heads trying to work out which ones goes where and what goes in that screw hole, what order to put it back together, but you get there eventually, and Subaru make it some what easy, everything is marked with R or L EX or IN.  And the bolts are of differnt sizes and marking that in the end you can't really make a mistake if your watching what your doing.


What I thought would the hardest item to install ended up being straight forward. The timing belt was all about reading the manual, and taking your time. The belt is an STI belt with marks that line up with the marks on the pulleys. With all of the idlers, water pump and belt tensioner being new the timing belt install went very well.


Part of the rebuild was also pulling the power steering pump apart and replacing all the seals.  It wasn't that easy, had a bearing that just didn't want to come off.  But after some help from Colin at work and my new 20t press I got it off, and the power steering pump back together.


A few days later the engine was together, and looking a lot better, and a lot newer inside, than what it was a few weeks back.
 
Some more purchases,
20t press, got the most basic press I could get.
Cool It copper II wrap and hi heat coating paint for the exhaust header, they are just bolted up lightly in the picture, I've since pull them down and will be painting and wrapping them this weekend.
From Greenline in Japan 4 new Sard 650cc injectors and covers.

This weekend I will be going to see what has happened to the car shell, its been getting a roll cage now for months, I'm in no rush, but I need to look at getting this car back together soon.

Day 36 - 5th April 2011, Engine rebuild begins

Well again it's been a while since the last post, the car is still getting the roll cage installed, but I'm in no rush. So what have I been doing the past few months? Mostly cleaning and sorting out where things are and what I need to fix and purchase. Also I thought I would give engine building a go, thought it would give me a better idea on where everything is on the engine and have a better understanding how it all goes together.


This is the engine as it looks straight out of the car, one worrying thing is a large build up of oil on the left side of the engine on the block, and I'm not really sure where the oil has come from. The guy I got the car from said it needed a head gasket replaced, so I will need to investigate further.


The inlet manifold was the first item to be removed, its covered in oil around the left side, the first job will be to pull it down and give it a good clean.


Next was the timing belt cover to revile the double over head cam the timing belt snaking its way aroundes around. The pulley with the offset bolt is the timing belt adjuster, the pulley under that to the right is the water pump. The centre pulley is the crank shaft and the others are idlers.


Looking under the motor with the sump removed, the brown stain is from 18 years of oil.


Not everything has gone to plan. I had issues removing one of the cam pulleys, just couldn't get it to move, even the torque wench didn't move it. In the manual it showed a tool that locked onto the pulley then you can use a breaker bar to take the nut off. So last Sunday I got the welder out and started to build my own version of the tool and this is it. The first version the centre pin bent, so a few modifications, mainly filling the gap between the middle pins with weld the pulley was off.


Next was the cams and then the heads, everything bagged and a full video of me taking it apart, just in case I forget something.


After everything was taken off this is all that is left


Spend most of today cleaning the heads and engine block. Was a bit of a task, had to remove all the leftover gasket material from each opening with a Stanley knife blade, then clean the face with Metho.


The body was washed with a mix of diesel and Kero with lots of scrubbing.


Started work on cleaning up the radiator, the frame had rusted and there where missing screws. A quick trip to thc wreakers and $3 late had about 30 screws of all kinds for the car from a series 2 Liberty.


The radiator has been painted with Knight antirust primer and paint so it shouldn't rust again.


Another job that I've been working on most night for the past few weeks is identifying the wiring loom. After about 10 nights in the shed I finished cleaning and labelling the whole loom. The benefit of this was that I understood the loom, understand the manual and work out what connections would no longer be need.


As I'm rebuilding the car, I needed to get some bits a pieces.
This is the OEM kit, it is for the whole engine and worked out to be cheaper then getting individual parts.


As I'm not sure of the history of the engine and reading what should be replaced when doing an engine rebuild, I got a lot of new bits.

These are all the pulleys for the timing belt, including a new water pump.


Most of these pieces are for the turbo. With the current CAMS rules you have to run the original turbo, in this case it's a VF12, something Subaru no longer make. The turbo is in good condition, just need some new water and oil connections and new gaskets.


The next job is to start putting the engine back together and use up some new gaskets. I've also taken purchase of a STI DCCD 6 speed gearbox and R180 diff, so the car build is starting to get out of hand, but in a good way I guess.